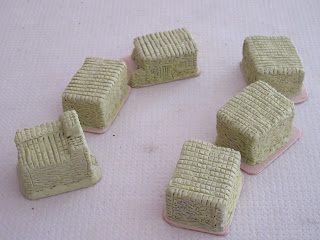
Photo one shows
the expanded foam material cut to a rough shape that forms the core for the five
buildings and a small church. These are basic structures of four walls topped with a
slanting roof.
In photo two each structure is covered with Milliput and
scored using a sewing needle. The Milliput is cut in small sections which are just enough
to complete one building at a time. Keeping a tub of water nearby is essential
as you will need to keep fingers moist or you may lift your work off its foam core.
Photo three is the village ready for use. The structures were
undercoated with white primer. Later the walls were painted first with a thin coat of mid-gray and later dry brushed with an earth colour. Using the same earth colour mixed with white, I daubed, not brushed a thin coat in a random manner. Adding more white to the earth colour I repeated the process to bring further variation to the walls.
The roof was painted with a mid-brown and thinned with water. Highlighting was done in a similar manner by adding more white to the mix resulting in a mottled effect.
Adding Nuln Oil (GW Shade) thinned with water I covered the entire structure to better define the tile roof and stone walls. Leaving these to dry for several hours I highlighted the walls and roof. Bases are covered with white glue and sand, painted and dry-brushed.
18-12-2018
I have added two enclosed fields for the rural village.
The walls are made with milliput, scored and painted in the same manner as the
village. The fields have appeared earlier ot the blog, but two of these were
used to construct an enclosed version for this project. The fields can be
llifted from the enclosure to allow troop placement or render a plundered
appearance.


4 opmerkingen:
Great looking buildings!
Phil,
Thank you for the kind comment.
These are absolutely wonderful!
Een reactie posten